CMS Changes in the Drupal 9 Upgrade
The Drupal 9 upgrade is an important update to our CMS platform that provides a few minor changes to how you interact with and manage your website. Please review the following information, most notably Logging In, to understand these changes.
Overview
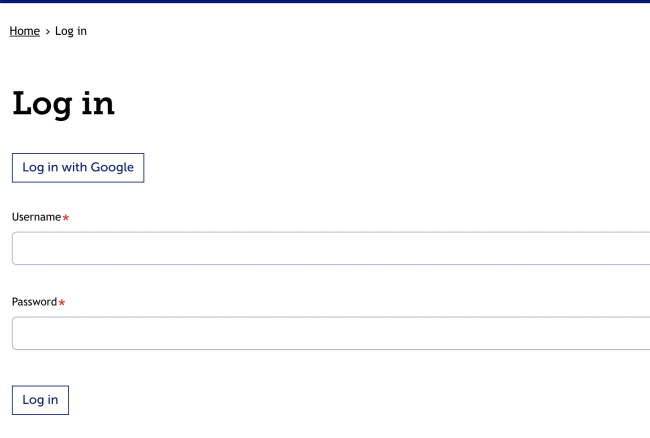
Log in with Google (Recommended)
This login method replaces Auth0 as our easy-to-use Single Sign-On (SSO) option, and functions exactly the same as before.
If you previously used an email address linked to a Google Account, all you need to do is go to /user, select “Log in with Google” and log in using your Google account credentials. As long as your Google account email matches the existing email found in the website’s People module, it will link the two together and maintain your permissions.
Username and Password
If not using a Google account to log in to your site, you also have the option of using a username and password to log in–just like before.
After the D9 upgrade on 12/18, these users need to set up a password with an existing username. To do this, visit /user/password (e.g. townofsomewhere.colorado.gov/user/password), enter your email address (the same one you used previously), and press the “Submit” button. You will receive an email with instructions to reset your password. Once you gain access to your site and have logged in successfully, please note the username at the top of your screen in the admin bar. This is the username you will use to log in from now on at /user.

If you are having trouble resetting your password, please contact us so that we can provide you with a temporary password and restore your access.
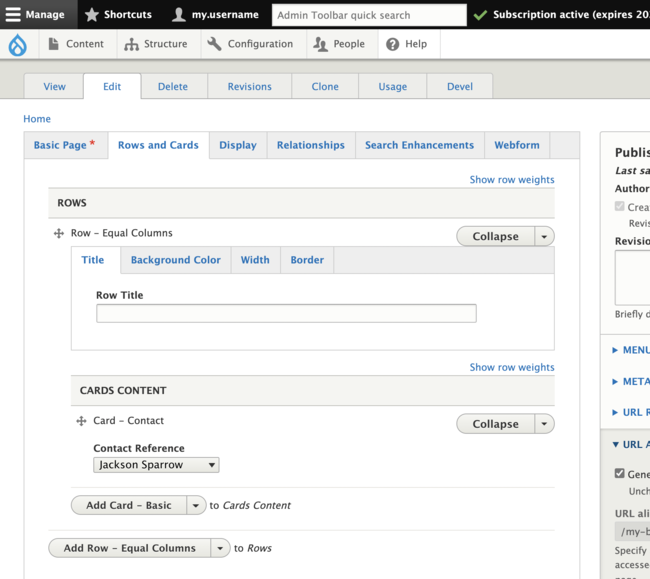
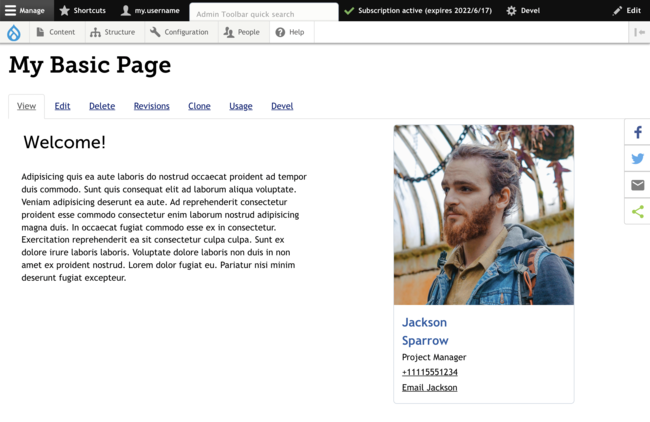
Contact Card
A new feature has been added to the CMS enhancing the Contact content type. Previously, the only place to view contacts was via the contacts view located at /contacts. Now, you can display contacts on any page with rows and cards via the Contact Card! To add a Contact Card to your page when editing, navigate to the “Rows and Cards” tab, add a new row, click the dropdown next to “Add Card - Basic”, and select “Add Card - Contact”. Choose which contact you would like to display using the “Contact Reference” dropdown.
Admin Toolbar Quick Search
The admin toolbar now includes a quick search feature, allowing you to easily search for and navigate to many of the areas you have access to as an authenticated user.
For example, if you can’t remember where the Custom Block Library is located, enter “Custom Block” into the search bar and click the link for the Custom Block Library!

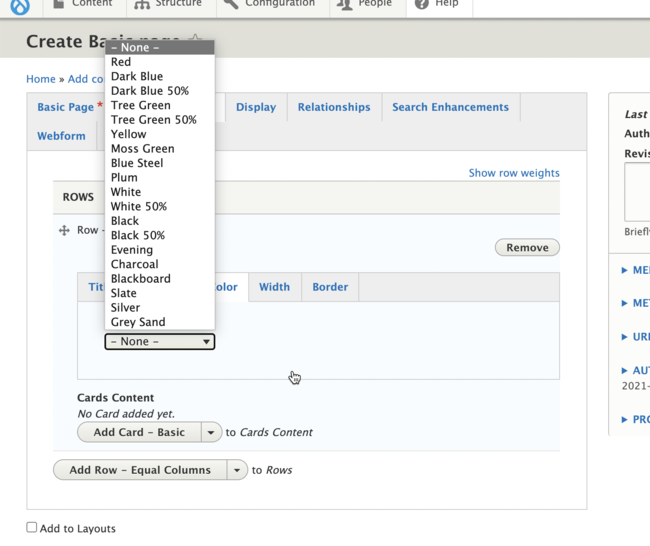
Background Color for Rows
Previously, rows included a color picker to choose the Background Color for the entire row. This has now been updated to use our predefined color options you’re familiar with across other parts of the CMS! This helps to both simplify the options and improve accessibility across our sites. If you need a reference for these predefined color options, please visit https://cms.colorado.gov/pick-color.
Views Button in the WYSIWYG Editor
A new button is included in the WYSIWYG editor to allow content authors to display Views of content e.g., Upcoming Events, Recent Articles, etc. This new feature replaces the View Card and has the same functionality. For any new content where a View is required, simply follow these steps:
- Add a Basic Card
- Click the Views button in the WYSIWYG edtior
- Select from the available views (see below)
- Save page

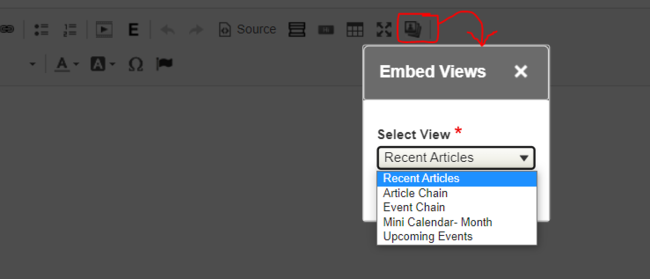
Views options include:
- Recent Articles
- Article Chain
- Event Chain
- Mini Calendar - Month
- Upcoming Events