Please note that webforms should not be used to collect personally identifiable information (PII). PII as defined by NIST is considered “any representation of information that that permits the identity of an individual to whom the information applies to be reasonably inferred by either direct or indirect means.” For more information on PII please visit: https://csrc.nist.gov/glossary/term/personally-identifiable-information
1. Follow the path Manage > Structure > Webforms.
2. If you are creating a webform, click add webform, if not skip to step 3.
a. Title the webform, add an optional administrative description and click Save.
b. You will be taken to the list of all webforms.
3. Locate the webform and click Build in the operations column
4. Add fields by clicking Add element, Add page, or Add layout.
5. Add more elements, pages, and layouts until satisfied.
a. Add elements by clicking Add Element and then select an element from the list. If you are unsure of what an element does, hover over the element and a pop-up will appear with a short description.
b. Add Layouts to your webform by clicking Add Layout and then selecting a kind of layout. Once you have selected the layout, it will populate to the bottom of your webform. Drag and drop elements into your layout to create space saving webforms.
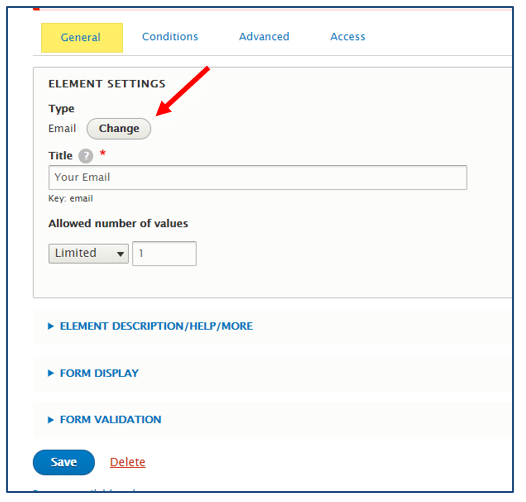
6. Edit elements by clicking them and saving changes within them.
a. Note if you want to change one element to another, edit the element and click the Change button next to the element type.
7. Move content within the webform by clicking and dragging the fields with the plus sign in the title column.
8. Click Save Elements at the bottom of the page.
Note: It is recommended to save elements often to ensure no loss of work.
