Articles are a different content type that are different from basic and landing pages. You can use articles to create News Articles, Blog Posts, and Press Releases. Articles are unique because articles of the same type can be organized and viewed in the same place. This includes recent article feeds that automatically update on a page (like your homepage).
Learn how to create new articles by following the instructions below.
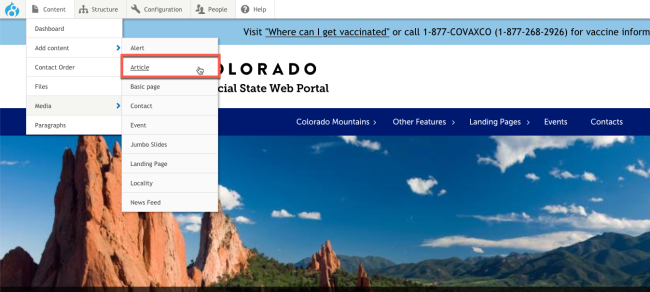
Step 1: Choose to Create a New Article
Go to: Content > Add Content > Article.
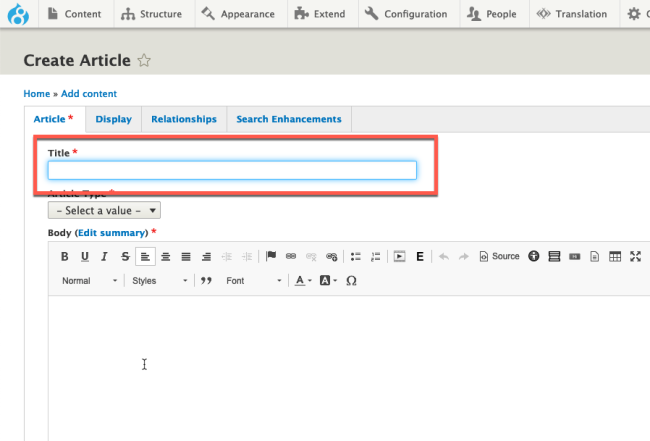
Step 2: Add the Article Title
Add the article name in the Title field.
Step 3: Select the Article Type
Click the Article Type drop-down menu. Select the kind of article you want to create. Functionally, they are all the same, but your choice determines how the article will be sorted:
- Blog Post
- News Article
- Press Release

Step 4: Add the Article Contents in the Body Field
Using the WYISWYG editor, add the contents of your article to the Body field of the article.

Step 5: (Optional) Edit the Article Summary
By default, if you choose to display an article feed, the system will grab the first few lines of the article body field and display it as a short snippet or summary of the article in the feed. You can gain more control of what displays for that article summary if you choose.
Read more about editing article's summary in this tutorial (coming soon).
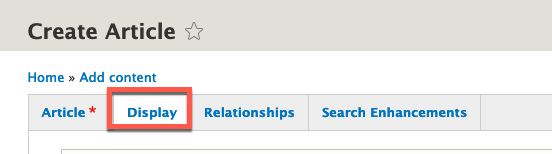
Step 6: (Optional) Enable Post Date, a Featured Image, or Other Display Options
While not required, there are a few additional display settings that may be helpful when publishing your article. To access the display options, click the Display tab.
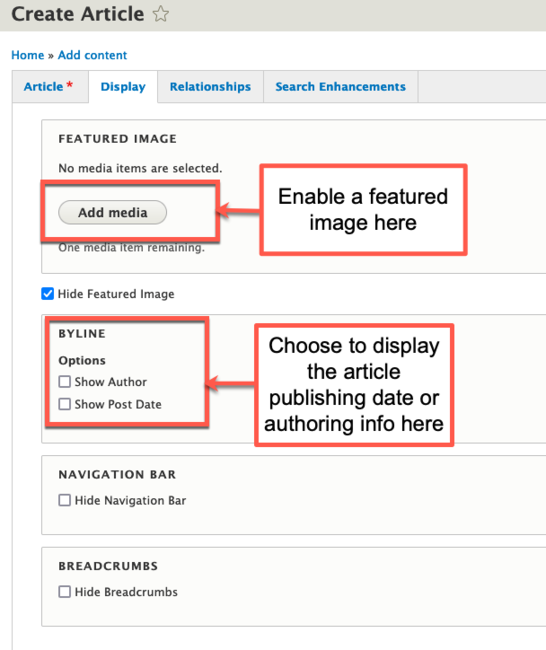
These common options can be enabled for your article:
- Show the Post Date and/or Author information: Scroll to the Byline section and check the appropriate box for either option. These display the article publish date and/or authoring information at the top of the article (below the title).
- Add a Featured Image: Learn more about featured images in our Featured Images tutorial.
- Other options are available. Learn more about those in the Display Options tutorial (coming soon).
Step 7: (Optional) Select Other Article Options and Settings
Additional options and settings can be found at the top and side of the article editing screen. Learn more about these in our Page Options and Page Settings tutorials (coming soon).
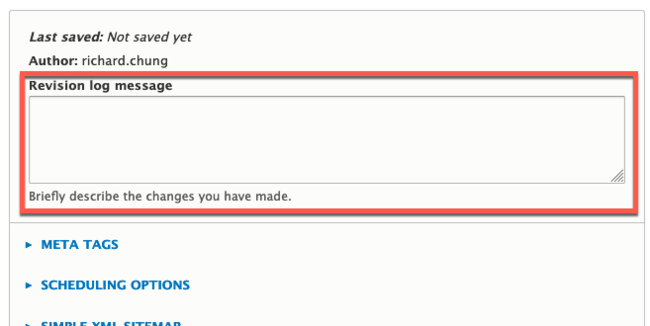
Step 8: (Recommended) Add a Revision Log Message
While not necessary, it is generally recommended that you add a revision log message whenever making edits to an article, particularly large or important edits. This makes it easier to track changes made to an article in case you need to review its revision history, especially on articles that are updated regularly.
Step 9: (Optional) Promote the Article to the Colorado.gov News Feed
State Agencies have the ability to promote their articles to the News Feed on the state's Colorado.gov website. Learn more about promoting articles in our Promoting Articles tutorial (coming soon).
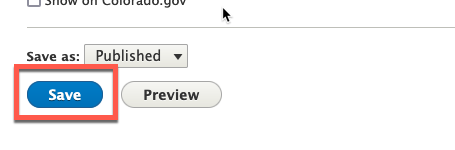
Step 10: Save Your Changes
When finished editing, save your changes by clicking the Save button. For an article to appear in a news feed or on Colorado.gov, it must be published.
Other Resources
Check out some of these other resources that may help.
Are you an EPM?
Entity Project Managers can open help tickets with our Service Desk.