Creating Revisions & Revision Log Messages
A Revision is automatically saved every time you make an edit and click Save. Revisions are saved for all content types except custom blocks.
Follow the instructions below to learn how to save revisions and (optionally) add a revision log message.
Step 1: Make your Edits
First, make any necessary edits to your page. This can be for a brand new page or an existing page.
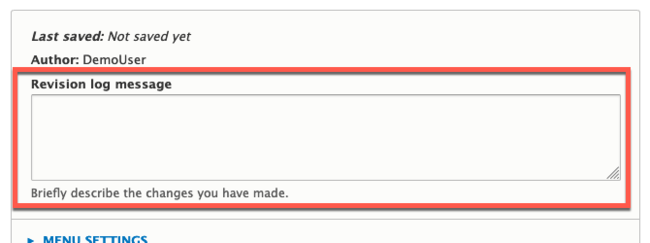
Step 2: (Recommended) Add a Revision Log Message
Although it is not required, you may choose to add a revision log message to help track details of changes that were made to the page. A revision log message may be most useful when tracking meaningful changes to a page.
Simply type a short but descriptive note in the Revision Log Message textbox at the right side of the screen to add a revision log message.
Step 3: Save your Changes
When finished making your changes, click the Save button at the bottom of the page. Everything, including the page content, page settings, and publishing status will be saved automatically.
Other Resources
Check out some of these other resources that may help.
Are you an EPM?
Entity Project Managers can open help tickets with our Service Desk.

