Creating Alternate Menus
In addition to the main navigation, the system allows for customized reference menus to be added to any page. Before a reference menu can be added to a page, the menu must be created. In the event you want to add a reference menu that is not the main navigation, you will need to create a new menu.
Follow these steps to create a new menu to utilize as a custom reference menu on your site.
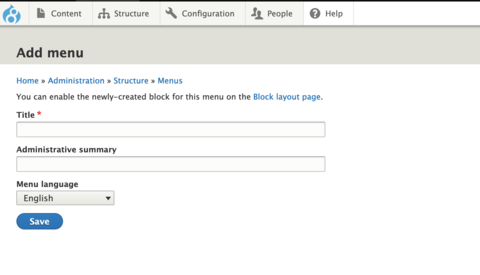
Step 1: Choose to Add a New Menu
Go to Structure > Menus > Add Menu.
Step 2: Create a Name for the Menu
Give your menu a title. This is not visible to end users. This is simply a label used to identify your menu later. The menu title must be unique.
(Optional) You can also add an administrative summary if you'd like - this just adds a descriptor for the administrator that describes what the menu is used for.
Make sure Menu Language is set to "English" unless otherwise needed.
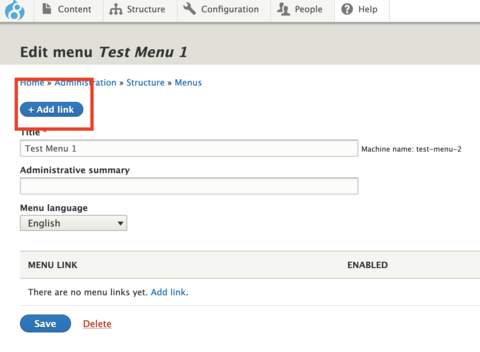
Step 3: Add a New Menu Link
Click + Add link.
Step 4: Add a Menu Link Title, URL, and Other Details
Add the information for the new link by filling out the following fields. The only required fields are the Menu Link Title and Link fields.
If you're adding a link for a page on your site, simply click inside the Link field and search for the page name.
(If you need to create a custom link that points to an external page, follow our instructions for creating a custom link.)
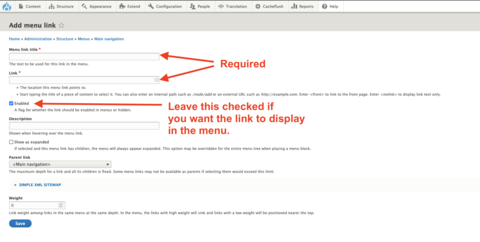
- Menu Link Title: Change the title of the link as it appears in the menu. This does not change the title of the page. By default, the menu link title will be identical to the page.
- Link: The full URL of the page you are adding. If this link is pointing to a page outside your site, you will need to paste the entire absolute URL (i.e., https://www....).
- Enabled: If this box is checked, the link will appear in the menu. If unchecked, the link will disappear from the menu.
- Description: This add a small description box that appears when a user hovers their cursor over the menu link.
- Show as Expanded: This forces the menu to display any child pages if any exist.
- Parent Item: This is used for positioning the menu link. Anything listed in tags (e.g., <Main Navigation> designates a menu. Anything listed with a number of dashes (e.g., -Mount Evans) designates a child page. The number of dashes indicates how many levels down the child page is in the menu.
- Weight: This is also used for positioning. Every menu link is given a weight, which positions the link within the menu. Menu links with lower weights are displayed before menu links with higher weights.
Step 5: Save the Menu Link
When finished, click Save.
For instructions on organizing the links in the custom menu, refer to our Organizing Menu Links instructional video for more information
Other Resources
Check out some of these other resources that may help.
Are you an EPM?
Entity Project Managers can open help tickets with our Service Desk.