Creating New Users with Google
To provide someone editing access to your website, they must set up a new user account. One way to set up the new user account is by using a personal email account. The other way is connect your Colorado.gov user account to a Google account.
Follow the instructions below to set up a new user account on your website using an existing Google account.
Step 1: Submit a Security Agreement
All users on the Colorado.gov website platform must have a signed security agreement submitted to our Service Desk. Any users found on the platform to have editing permissions to a website WITHOUT a security agreement can have their user account disabled or removed.
If you have not already, make sure to follow our tutorial on how to fill out and submit a user security agreement.
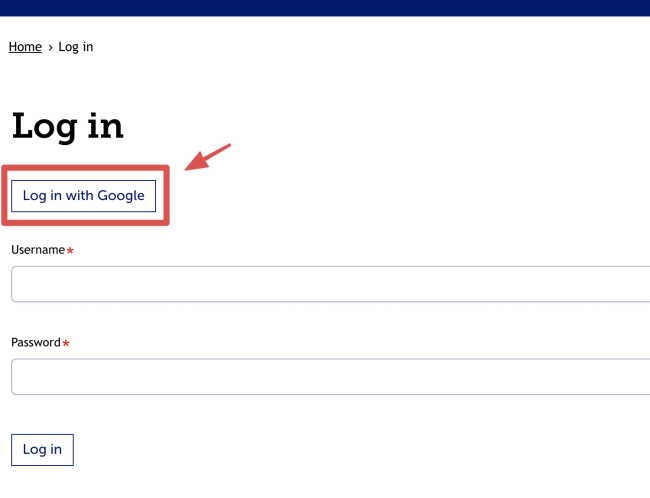
Step 2: (New User) Go to the Log In Page
The first step must be taken by the new user (not the website admin). Navigate to your login page by adding '/user' to the end of your website's URL.
(e.g., example.colorado.gov/user)
Step 3: (New User) Click the Log In with Google Button
The Google Account used to create a login must only be accessible by a SINGLE individual to comply with our security standards. Any shared user accounts may be disabled or removed.
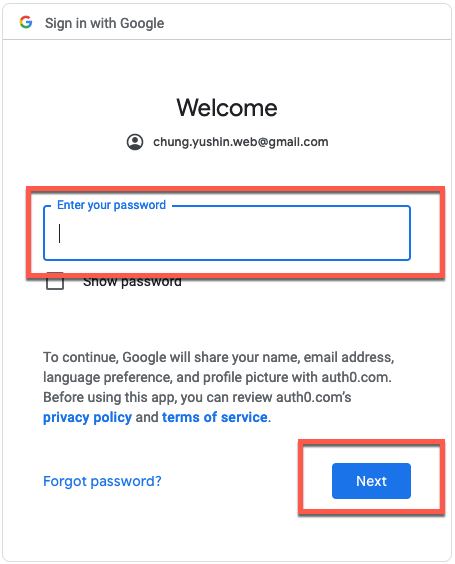
Step 4: (New User) Enter your Google Email
You will be taken to a Google sign-in page.
Enter your Google Account email address into the Email field. Then, click Next.

Step 5: (New User) Enter your Google Password
In the password field, enter your Google account password. Then, click Next.
If you have two-factor authentication set up for your Google account, then you will need to verify your login before continuing.
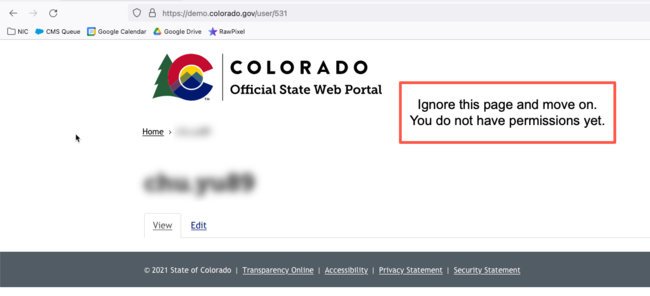
You will be taken to a newly generated account, but you will not have permissions to edit yet. Ignore this page for now. The next steps require your website admin to provide your user permissions.
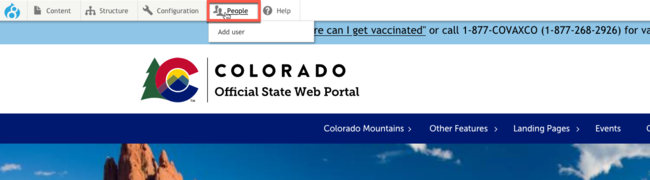
Step 6: (Website Admin) Go to the People Admin Page
Once the new user verifies their account, the website admin must enable the new user's permissions.
First, log into the website and click on People (ignore the Add User option that appears).
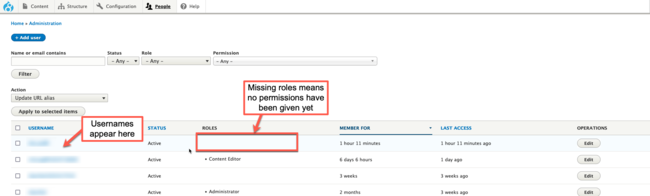
Step 7: (Website Admin) Locate the New User Account
The new user account should appear near the top and will not have any permissions in the Roles column.
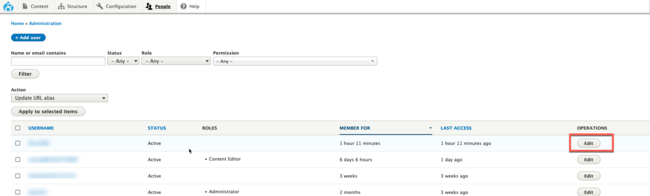
Step 8: (Website Admin) Click Edit
Click the Edit button in the operations column for the new user account.
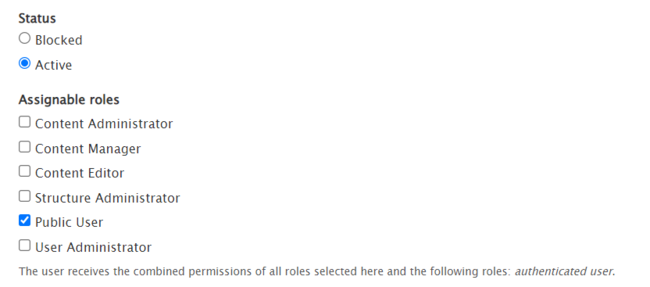
Step 9: (Website Admin) Check the Roles You Want the New User to Have
Scroll down to the Assignable Roles section. Check the permissions that you want the new user to have. A full description of each assignable role can be found on our User Roles page.
Step 10: (Website Admin) Save Your Changes
When you finish setting up the new user account, click Save.

The new user can now log into their new account.
Other Resources
Check out some of these other resources that may help.
Are you an EPM?
Entity Project Managers can open help tickets with our Service Desk.