A landing page is a unique content type and is different from a basic page. Landing pages have a single focus, act as a hub for related information, and are often treated as a standalone page separate from other parts of the website. Your homepage is an example of a landing page. Your organization might find it useful to use landing pages for separate divisions or programs that need their own space on the site.
Check out our guide on differences between landing pages and basic pages before deciding whether or not you need to make a new landing page. In many cases, the only landing page on a site will be the homepage. If you need to create a new landing page, follow the instructions below.
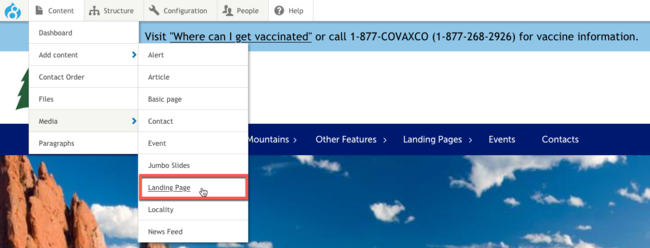
Step 1: Choose to Create a New Landing Page
Go to Content > Add Content > Landing Page.
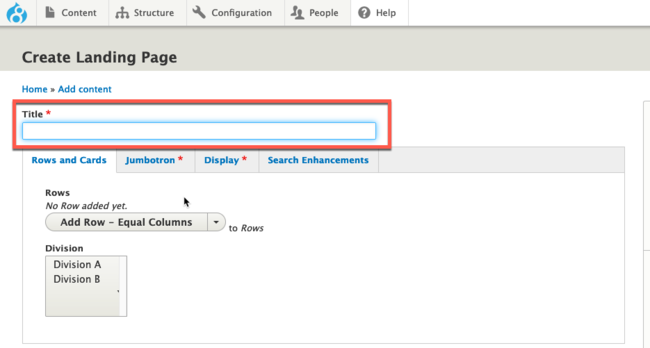
Step 2: Add a Page Title
The page title should be intuitive and indicative of what is on your page. A good title will contribute to good Search Engine Optimization.
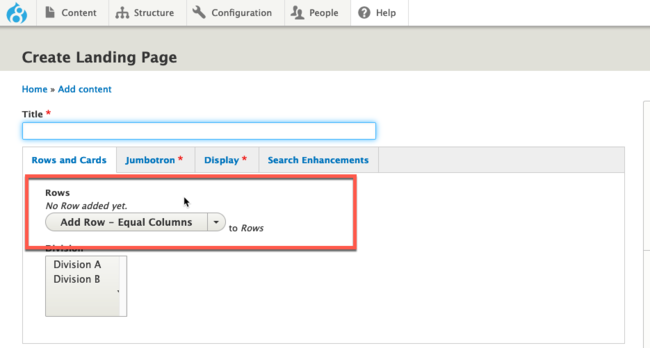
Step 3: Add the Page Content
The only way to add content to a landing page is through Rows and Cards. This is a more advanced feature that we recommend users familiarize themselves with after learning the basics of the website platform. You can learn more about this in our Rows and Cards Tutorial.
Not done? No problem. Save the page and come back later to finish what you started.
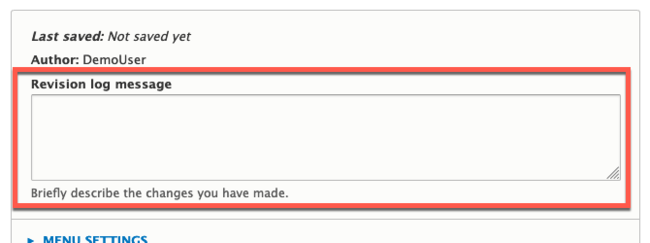
Step 4: (Recommended) Add a Revision Log Message
While not necessary, it is generally recommended that you add a revision log message whenever making edits to a page, particularly large or important edits. This makes it easier to track changes made to a page in case you need to review the page's revision history, especially on pages that are updated regularly.
Step 5: (Optional) Set Additional Page Options
Basic Pages offer a lot of additional options that allow you to have more control over how your page is presented and functions. Depending on how your organization has set up their pages, many times, these settings can be skipped. In some cases, they may be necessary. A brief description of what can be done is listed below. Full tutorials on all these options can be found in dedicated training pages of this program.
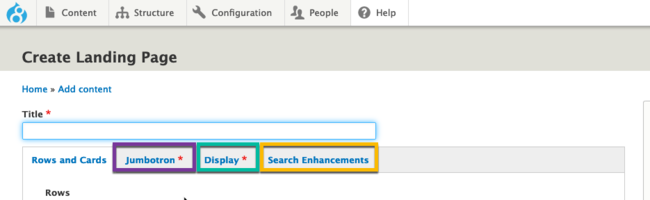
- Jumbotron: Use these settings to...
- Enable the jumbotron
- Disable the jumbotron
- Display: Use these settings to..
- add a featured image
- add a left or right reference menu
- enable or disable the footer on the landing page
- display the navigation bar above the jumbotron
- hide the main navigation bar (on only this page)
- hide the breadcrumbs (on only this page)
- Search Enhancements: Use these settings to....
- Manually modify your page's summary on your website's search results page.
- Archive the page to hide it from your website's search results page.
- Promote the page within your website's search results page to make it more visible.
Step 6: (Optional) Set Additional Page Settings
Additional settings can change other elements of your basic page. These are not necessary depending on how your organization has set up their pages. A brief description of these settings are listed below. Full tutorials of these settings can be found in dedicated training pages of this program.
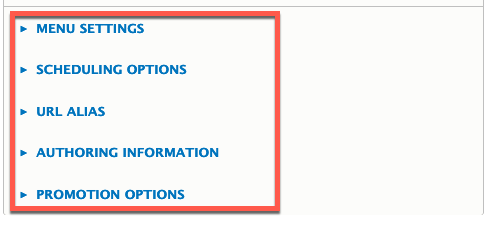
- Menu Settings: Add the page to a menu (such as the main navigation).
- Scheduling Options: Set a date and time for when the page publishes or unpublishes.
- URL Alias: Manually customize the page's URL.
- Authoring Information: Access the page's original creator and authoring date info.
- Promotion Options: Create a private page.
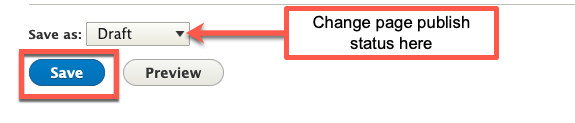
Step 7: Save the Page
When finished, save your changes by clicking Save.
The page will automatically be saved as a Draft, but if you are ready for others to see the page, change the status of the page to Published. Learn more about publishing states in our Publish States tutorial.
Other Resources
Check out some of these other resources that may help.
Are you an EPM?
Entity Project Managers can open help tickets with our Service Desk.