Adding Images with Media Cards
Media Cards are the best way to display images on individual pages (as opposed to embedding images into the body field of a page). The benefits are numerous:
- Images are automatically scalable and adjust for mobile.
- They can be linked to other pages and documents.
- Images in Media Cards require alternative text, helping your site comply with modern accessibility standards.
- Images used in Media Cards only have to be uploaded once, but can be used across multiple pages.
- Deleting a Media Card does not delete the image, preserving your site assets.
Once you have learned how to use Rows & Cards, you are ready to use Media Cards! Follow the instructions below to learn how to add Media Cards to your pages.
Step 1: Upload the Image to the Media Library
If this step is not already completed, follow the instructions outlined in our Uploading Images to the Media Library tutorial.
Step 2: Open the Rows and Cards
When editing your page, click the Rows and Cards tab.

Step 3: Select the Row to Edit
Drill down to the row you need to edit or create a new row.
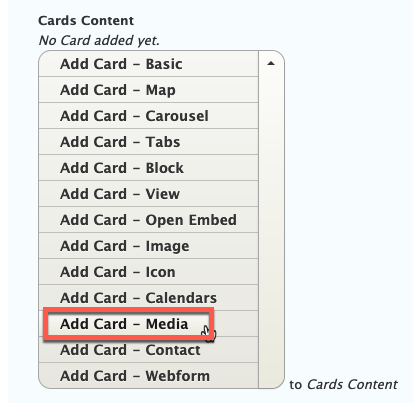
Step 4: Add the Media Card
Under Cards Content, click the drop-down arrow and select Add Card - Media.
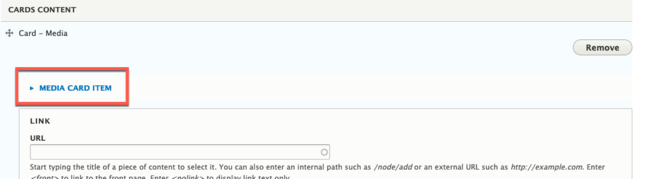
Step 5: Open the Media Library
Click Media Card Item to open the Media Library.
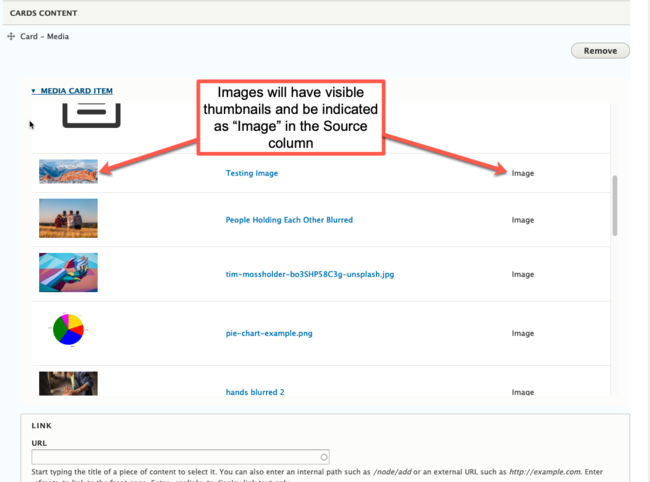
Step 6: Select the Image
Scroll down and click on the image you want to display.
Images should have a visible thumbnail. Under the Source column, it should say Image.
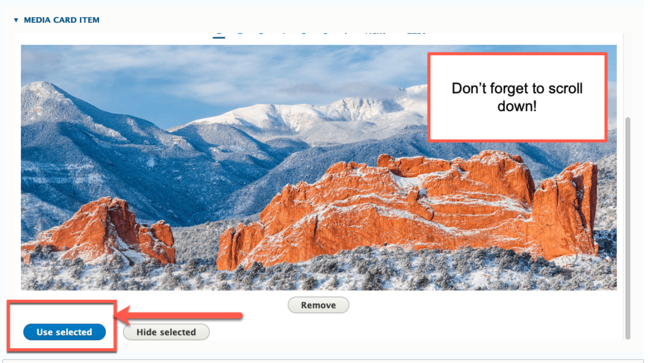
Step 7: Confirm your Selection
Scroll down inside the Media Library window and click the blue Use Selected button.
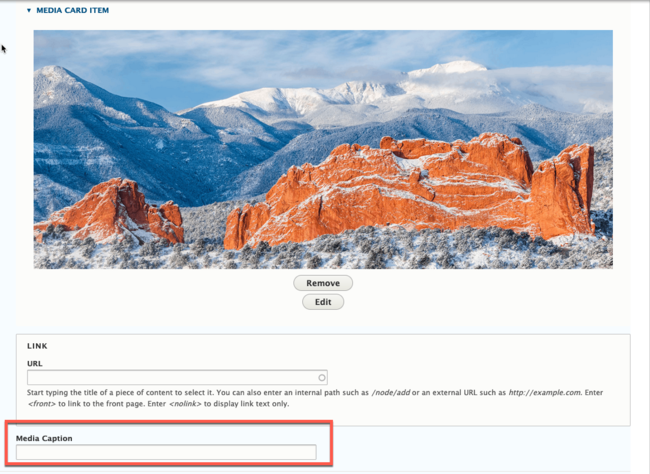
Step 8: (Optional) Add a Link
If you need to make the image a clickable link, add the link to the URL field.
- If the link is pointing to an external webpage, copy and paste the entire URL in the Link field.
- If the link is pointing to a page inside your website, simply search for the page name.

Step 9: (Optional) Add a Media Caption
The Media Caption field displays a small description below the image. If you wish, add a short description for your image here.
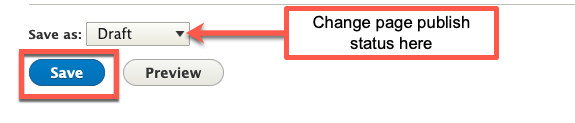
Step 10: Save your Changes
When you are done make your page edits, click Save.
Other Resources
Check out some of these other resources that may help.
Are you an EPM?
Entity Project Managers can open help tickets with our Service Desk.