While it is normally recommend to display images in Media Cards, there may some instances where you need to display the image in the body field of a page or basic card. Some reasons might include:
- You need a little more control over the sizing of the image.
- You want to wrap text around the image.
- You want to add a title above the image.
Whatever your reason may be, follow the instructions below to add the image to the body field of your page or basic card.
Step 1: Upload the Image to the Media Library.
If this step is not already completed, follow the instructions outlined in our Uploading Images to the Media Library tutorial.
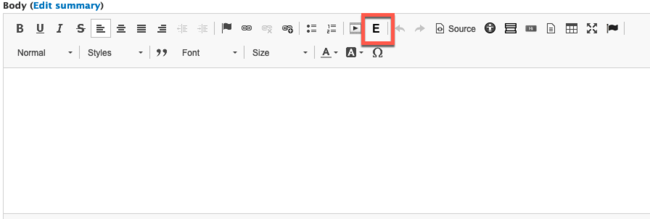
Step 2: Click the Media Browser Button in the WYSIWYG
Place your cursor where you want the image to appear. Then, click the E button in the WYSIWYG to access the Media Library.
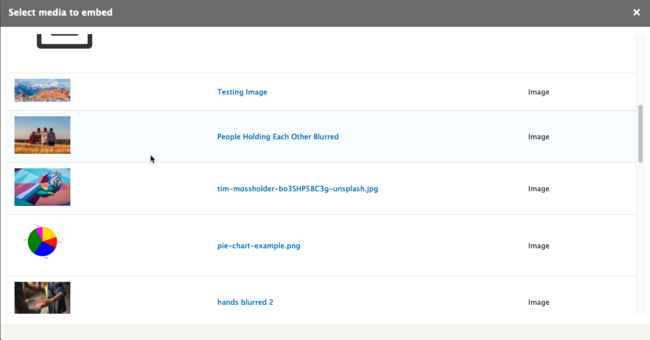
Step 3: Select the Image
Once the Media Library window opens, click the image that you want to display.
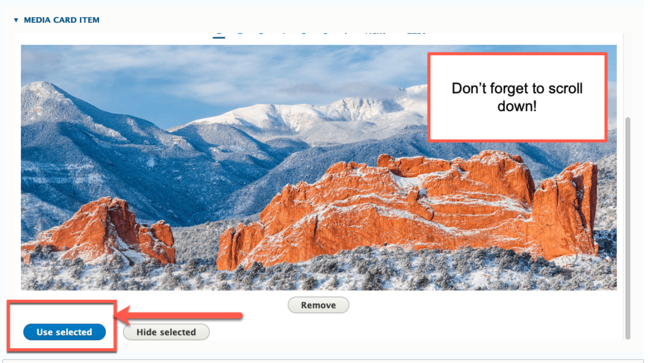
Step 4: Confirm your Selection
Scroll down and click the blue Use Selected button.
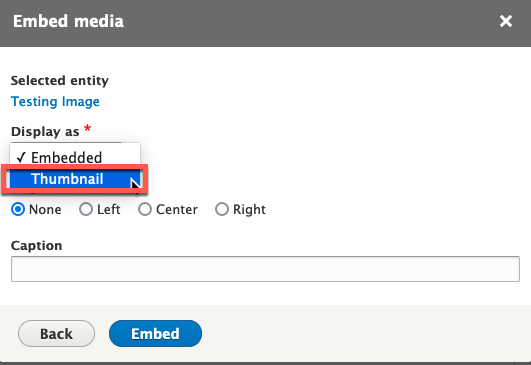
Step 5: Display Image as Thumbnail
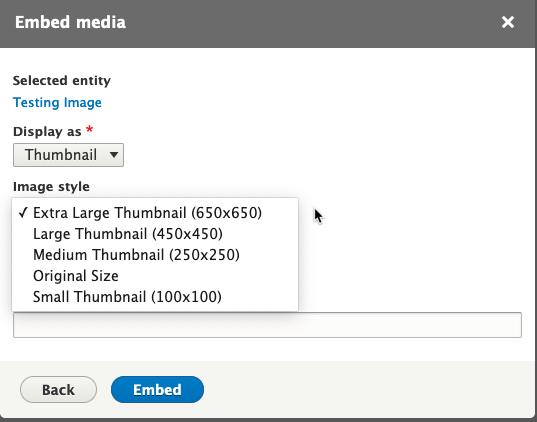
In the Display As drop-down, choose Thumbnail.
Step 6: Choose the Image Size
In the Image Style drop-down, choose the image size. You have only five choices:
- Small (100 x 100px)
- Medium (250 x 250px)
- Large (450 x 450px)
- Extra Large (650 x 650px)
- Original Size
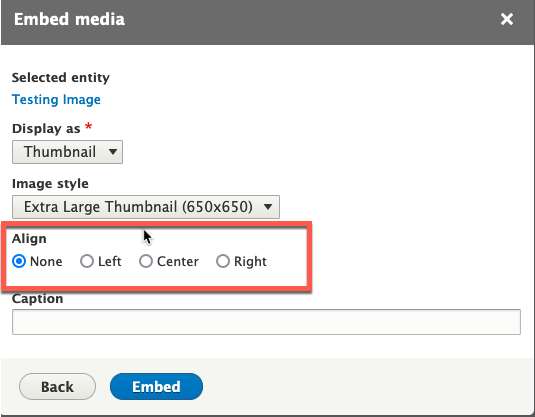
Step 7: (Optional) Choose the Image Alignment
If you leave the default alignment to None, then all text will appear above or below the image. If you align the image Left, Center, or Right, then you can wrap text around the image.
Select the corresponding radio button to make your alignment choice if you need to change it.
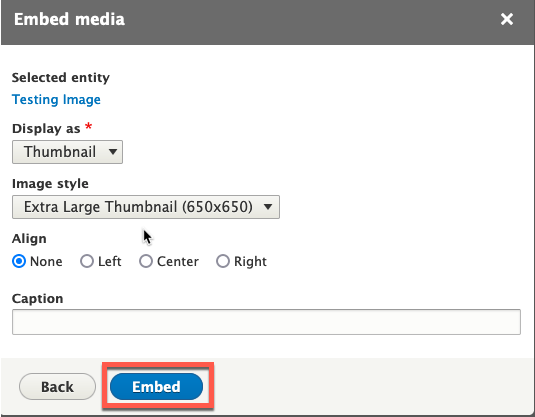
Step 8: Click Embed
Clicking the blue Embed button will add the image to the body field of your page or basic card.
Step 9: Save your Changes
When finished editing your page, click Save to save your changes.
Other Resources
Check out some of these other resources that may help.
Are you an EPM?
Entity Project Managers can open help tickets with our Service Desk.
